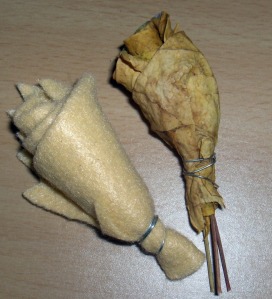
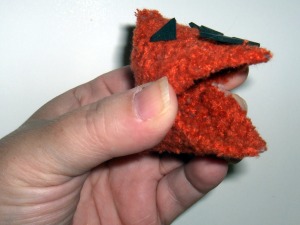
We had a great time on In the Season today! Maria showed us some fabulous gift ideas and I talked a little bit about Advent and Hanukkah. Advent begins on Sunday, Nov. 28th this year. To figure out the date that Advent begins each year, first you need to see when Christmas Day is. The closest Sunday before Christmas Day is the 4th Sunday of Advent and then you just count back from there. O Come O Come Emmanuel is one of the commonly sung Advent hymns:
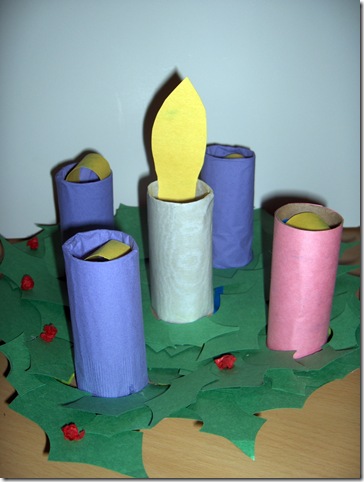
I showed how to make a child friendly Advent wreath. When I was teaching, kids always wanted to help light the candles on the Advent wreath but of course this could become dangerous. They also liked to have their own wreaths and so I came up with this idea. The main base of the wreath is a paper plate here but you can also just cut a circle out of a scrap of cardboard. For each of the candles I used a toilet paper tube. The tubes can be covered with tissue paper, construction paper, napkins (that’s what the purple ones here are covered with), felt, or fabric to name a few materials. If you use fun foam or a fairly sturdy paper, you often don’t even need the tp tubes as those materials will stand in a tube shape on their own. I’ve also had children paint or colour the tubes instead of gluing things on. It partly depends on the age of the children you’re working with and what skills you’d like them to practice. For attaching the tubes to the base, I found it helpful to “fringe” the bottom of the tube – making little 1/4 inch slits all the way around so you can bend those out into tabs. This gives you a better surface than just the edge of the tp tube to put the glue on. For this wreath, I cut out a bunch of holly leaves from construction paper but again there are many other possibilities. With little ones, I often used green tissue paper that they could tear and crumple into small balls and then glue those on. For older kids, I would give them a holly template and they could practice tracing around it and cutting out the leaves themselves. Here, I’ve crumpled up little balls of red tissue paper as the berries but you could also let the children use a hole punch and punch out circles from construction paper. The part the kids all loved best was that they could “light” their candles each week. As you might be able to see in the picture, what I do is to tape the flames (cut out of construction paper – I made a flame shape but a plain old rectangle works too) inside each tube and then “tuck” the flames down inside. When ready to “light” one of the candles, the child can merely pull the flame up out of the tube as you can see with the center candle. For more tips and to see just how I put this all together, check out the playback of today’s show.
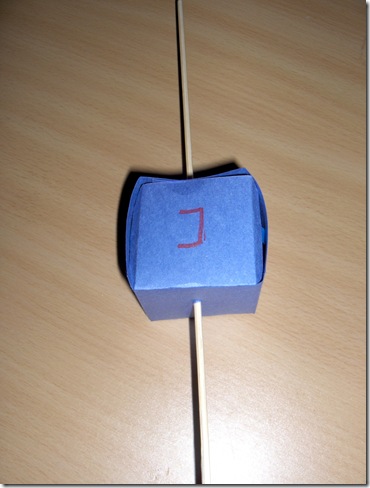
Today I showed how to make a simple Dreidel with your children. This is just a cube made from a piece of construction paper with a bamboo skewer stuck through so that it can spin. Please excuse the symbols on mine – I copied them the best I could! The idea is that each person playing has some gelt (chocolate coins) and before each round, they each put in 1 or 2 into the center (kind of like putting in the ante when playing poker). Then a person takes their turn at spinning and depending on which symbol lands face up, that directs them as to what they get to do. For example, if they spin and get Nun – they do nothing and the turn passes to the next player (leaving the coins in the pot and adding another “ante”). If they get Gimel, they take the whole pot. If they get Hei, they take half the pot, and if they get shin, they have to put a coin in. It’s a fun game and if you can’t find the Hanukkah gelt to use (it’s plentiful at party stores in my neck of the woods – as are wooden dreidels), you can always play with chocolate kisses or some other wrapped candy! If you’d like to try this game with your family, here’s a link that will take you to a printable template for a Dreidel that’s similar to the one I made along with the symbols and instructions.
Here’s the playback link to today’s In the Season. Check it out! We’re live every Friday at noon Eastern. Come and join in the fun!
The word Advent means “coming” and it is a season when the focus is on preparing for Christmas. The different parts of the Advent wreath symbolize different things. It is usually a circle because circle is eternal like God’s love. There are some churches that use a triangle shape instead to symbolize the Trinity. The wreath is made of evergreens to remind us that God never changes. Holly is often used as a reference to Jesus’ crown of thorns – the red berries representing the drops of blood on Jesus’ head. Three of the candles are purple – purple is the colour of royalty and repentance. One candle is pink – that candle is lit the third week and stands for Joy as Christmas is almost here. Some people, like me, also use a white candle in the center as the Christ candle to be lit on Christmas Day, white signifying purity. The candlelight itself reminds us that Jesus is the light of the world, especially during this, the darkest time of year.

I showed how to make a child friendly Advent wreath. When I was teaching, kids always wanted to help light the candles on the Advent wreath but of course this could become dangerous. They also liked to have their own wreaths and so I came up with this idea. The main base of the wreath is a paper plate here but you can also just cut a circle out of a scrap of cardboard. For each of the candles I used a toilet paper tube. The tubes can be covered with tissue paper, construction paper, napkins (that’s what the purple ones here are covered with), felt, or fabric to name a few materials. If you use fun foam or a fairly sturdy paper, you often don’t even need the tp tubes as those materials will stand in a tube shape on their own. I’ve also had children paint or colour the tubes instead of gluing things on. It partly depends on the age of the children you’re working with and what skills you’d like them to practice. For attaching the tubes to the base, I found it helpful to “fringe” the bottom of the tube – making little 1/4 inch slits all the way around so you can bend those out into tabs. This gives you a better surface than just the edge of the tp tube to put the glue on. For this wreath, I cut out a bunch of holly leaves from construction paper but again there are many other possibilities. With little ones, I often used green tissue paper that they could tear and crumple into small balls and then glue those on. For older kids, I would give them a holly template and they could practice tracing around it and cutting out the leaves themselves. Here, I’ve crumpled up little balls of red tissue paper as the berries but you could also let the children use a hole punch and punch out circles from construction paper. The part the kids all loved best was that they could “light” their candles each week. As you might be able to see in the picture, what I do is to tape the flames (cut out of construction paper – I made a flame shape but a plain old rectangle works too) inside each tube and then “tuck” the flames down inside. When ready to “light” one of the candles, the child can merely pull the flame up out of the tube as you can see with the center candle. For more tips and to see just how I put this all together, check out the playback of today’s show.
Hanukkah begins this year on Wed. Dec. 1st. Now, I’m no expert in Jewish history so please if I make any mistakes here, feel free to correct me! The word Hanukkah means dedication in Hebrew. My understanding of Hanukkah is that it commemorates the rededication of the Holy Temple in Jerusalem after the Maccabees were able to drive the Syrians out in 2nd century BCE. Because the Syrians had been using the temple as their own, the temple needed to be rededicated to God. This rededication meant relighting the eternal flame within the temple but there was only enough oil to keep it lit for one day. Through God’s miracle, the flame remained lit for 8 days, giving them just enough time to press some more oil. Hanukkah is, therefore, an 8 day celebration. A crucial part of each day’s celebration is the lighting of the candles on the Menorah. A Menorah has 9 arms to it – one for each day of Hanukkah and the 9th one being the Shamash – the candle that is used with which to light the others. A fun game often played at Hanukkah is Dreidel, a spinning top game.

Today I showed how to make a simple Dreidel with your children. This is just a cube made from a piece of construction paper with a bamboo skewer stuck through so that it can spin. Please excuse the symbols on mine – I copied them the best I could! The idea is that each person playing has some gelt (chocolate coins) and before each round, they each put in 1 or 2 into the center (kind of like putting in the ante when playing poker). Then a person takes their turn at spinning and depending on which symbol lands face up, that directs them as to what they get to do. For example, if they spin and get Nun – they do nothing and the turn passes to the next player (leaving the coins in the pot and adding another “ante”). If they get Gimel, they take the whole pot. If they get Hei, they take half the pot, and if they get shin, they have to put a coin in. It’s a fun game and if you can’t find the Hanukkah gelt to use (it’s plentiful at party stores in my neck of the woods – as are wooden dreidels), you can always play with chocolate kisses or some other wrapped candy! If you’d like to try this game with your family, here’s a link that will take you to a printable template for a Dreidel that’s similar to the one I made along with the symbols and instructions.
Here’s the playback link to today’s In the Season. Check it out! We’re live every Friday at noon Eastern. Come and join in the fun!


